glittersweet: (Default)

While I edit and standardise some files I thought I’d also share some of why I decided on a mantua over a francaise: The Blue second Managers gown from Phantom of the Opera.


The 1870s had a heady mix of 18th century inspiration. Right across the Baroque to Rococo.


So there are times where self fabric or matched colour trimmings mimic or reference the latter part of the century, so too are there times the mantua is a clear inspiration.


This is especially true for the late 1870s as the waist dropped a little, and the bodice hem dropped further. The entire style was narrow, with a focus on the tablier (front of skirt panel) and a looped back train.


It’s possible to consider pannier style drapery as the extension of the front of the mantua robe, and the water fall as the back of the robe. The apron drapery can even be brought in separately though usually these seem to be of a different material.


I am quite enjoying the fact that my mantua can be used to illustrate the similarities and differences in cut and fit and in construction as I used my library of patterns for both my own Blue dress and Mantua.

glittersweet: (Default)

I’m separating each inspiration source, so here is the Welsh Museum garment with a bit more information.


COLLECTION AREA Social & Cultural History
ITEM NUMBER 23.189.1
MATERIAL damask (silk) metal thread silver parchment flax (spun and twisted) silk (spun and twisted)

https://museum.wales/collections/online/object/e2ce99c3-462b-3da3-af0a-953e4f94008d/Dress/footer/


I don’t know if it’s possible to convey how much I love this gown.


A few people have managed to take photos when it has been exhibited and it does exactly as expected- the colour shifts to a more aqua tone.


British circa 1730 Teal Spitalfields Silk Court Mantua possibly belonged to Lady Rachel Morgan nee Cavendish daughter of the Duke of Devonshire. St Fagans National Museum of Wales

ttps://twitter.com/ladycecilynevil/status/1251855616487849985


For a pattern and a lot more information:


Arnold, Janet, A court mantua of c. 1740,Costume, London,#6, 1972, pp 48 – 52.

glittersweet: (Default)

I’m still working through my files, so here is another of my favourite Mantua. A deep blue silk covered in silver embroidery.


Right now I don’t have access to the printed materials so I’m mostly inspired by the over all effect, and as my lace has a very uneven but scalloped hem I’m using this to help with what to do with it. I wish I had noticed the hem protection earlier as I am going to want that, and I can do that by machine. If the machine work is over in my lace I’m going to reserve my hand sewing for where it will have impact.

glittersweet: (Default)

I have all my stay pieces. They are a beautiful satin faced linen, a very close weave so still will be a bit warm.


I need to cut some straps, but all the channels are stitched and it is fully boned. Meaning no gap between bones. The majority of stays are like this. But the channels also tend to be much smaller. I’m using some left over cable ties as I can quickly swap out permanently bent ones. Without waiting on a package from overseas 🙂


Actually I do want to order a huge amount of ultra thin boning. I think I could actually get a better match to the extremes between my rib and waist that way but also I will be able to do so a bit more comfortably.


Cording just collapses. I keep really wanting to go earlier as well like these:


Red stays from Manchester Art Gallery (1620-1640), Pink stays from the V & A Museum (1660-1680)


But look at how fine all those channels are. And these are not outliers. Most of the stays even from the 16thC have narrow channels.


I’ve had a look for stay patterns as close to 1700 as possible and I think I need to alter a few pieces. I’m missing a little extra at the waist in either a side front panel or side back.


I had to include Garsault here for the boning within each panel, but a c1700 Polish manual (scroll down to 2016)and a 1713 manual (there are two parts so I linked to my reference site) can be used with it.


The Linzner Schittbuch also includes some gowns.


I think I used Hunnisette for the basic shapes to allow me to have a little leeway for my ribs because they distort stays even like this. It’s very hard to get a conical shape, so the way Hunnsett’s

glittersweet: (Default)

Finally, I’ve started to get back to projects. I really need something with no rules, and makes use of two very pretty but modern fabrics, a shot blue taffeta and a heavy fully sequined lace. It was very hard to decide between my two designs. My few rules are it does stick to historic cut, and to use up all of both fabrics. 4m of the lace, I think it was 9m of the blue.


Deciding to go all in on an early Mantua by pinning my lace the full width? Wow.


Now that is a statement, but just how much of my lace should I use? There are 6 rows, the skirt has a 3m hem.


I think I can use the Welsh Mantua as I can use as much lace as possible on the petticoat and ignore the “train” which will help me make the most use of the fabric- 4 rows on the underskirt, leave 2 rows for robings. https://museum.wales/collections/online/object/e2ce99c3-462b-3da3-af0a-953e4f94008d/Dress/footer/


I started adding all of my references but I think I should do that over a few posts so I can focus on each properly.

glittersweet: (Default)

I don’t think it should come as a surprise that yes I now have Plans.


The travel coat and boots, the water dress, the [spoiler], and maybe the pale pink ombre gown.


I was very lucky to have not been spoiled at all, not for the music, nothing but the early teasers. But there are some really big emotional moments and that’s usually the point at which I go from wanting to make something to actually making it.


I have shared how I made my Ice Dress and explained where I went for accuracy and where I went for interpretation.


Mostly I went for interpretation where there was a better “read” than trying to go accurate. The ice of the bodice moves in a way doesn’t really work with seequins glued or sewn. I think I figured out a few options but I went for the rhinestones to create the depth of light. But honestly they are absolutely enchanting to very young kids, and they are sewn down securely to let them interact with them.


They have a physical dimension as well as light bending dimension.


My ice gown is peak blend of historic and theatre so that it is very durable. My cape is a bit fragile but not as much as might be thought. I might give it an organza backing to give a bit more body and allow me to stitch the applied flakes down.


So this takes me back to my Plans. I think I have enough to make the [spoiler] right now from stash, which would be amazing. I need to check how much I put into my Bubble dress as that is also something I really want to finish.


But I am really looking at how to mimic magic. So a fair amount of illusion in the form of mesh and bridal tulle. I will have to make sure the tulle is able to be removed as it can snag so very easily.


The water dress blends into her skin in a way that might require both illusion net as well as sfx. which I can do. Luckily that is straight to skin and not on top of paint.


And the boots… oooh. Got some ideas on that. Texture is so important and they are matte- but glow. They are not the matte of when her powers are out of control, but they differ from the slick and AB affect of her fully controlled powers. I don’t think they were intended to show how really subtle her powers have developed but, the entire outfit really is a symphony of mimics of real world techniques that would require absolute mastery. Her shoulders have the clearest example of this in the silvery raised but flat flakes and the speckled “beads” all over. I would probably digitise the flakes and get them machine embroidered in silver thread in stain stitch and have a heavy fuse underneath. Then the beads as frosted thingies.. not rocailles as they have soft edges, but the ones cut from tubes.


The coat is heavy but is not quite like the Ice Gown skirt. So there is a bit of work to get the very fine flat surface with the weight needed. There will be flatlining and a careful choice of lining full stop. And I think I will be doing a tulle layer over fairy organza (soft and moldable) over stretch charmeuse. Shaping in the charmeuse with the outer layers eased over. SO a bit of care in the order of making so as to get that.


As a musical theatre nerd and long time nerd at that I am not very surprised how much Elsa means to people, but especially to kids. She is wrapped up in a very “princessy” shell but I do think the near obsession goes much deeper than that. Belting songs, they are all about fairly raw emotion and from places that we find difficult to talk about.


(BTW Anna gets a deeply emotional song that might spark some quite intense feelings, I cried as I have been to that place a few times for very different reasons and yet it is also practical and hopeful.)


So yes, I cried a fair bit and still do with a few more listens to the songs.

glittersweet: (Default)

I’ve had my first infusion, not feeling terribly great but that’s because it is doing what it is supposed to. So I feel flu-y. Time for some more paracetamol and a rest.


So I can’t really use too many “spoons” outside of healing. Tomorrow I’ll rehem Elsa (horsehair braid really does help the hem kick out.) Friday is my nerve conduction test (really scared I’ll wind up sick in the room. Not great with needles any more.)


So I’ll have to wait til after that for Ahsoka. Luckily she isn’t a heavy project. Just frustrating.

glittersweet: (Default)

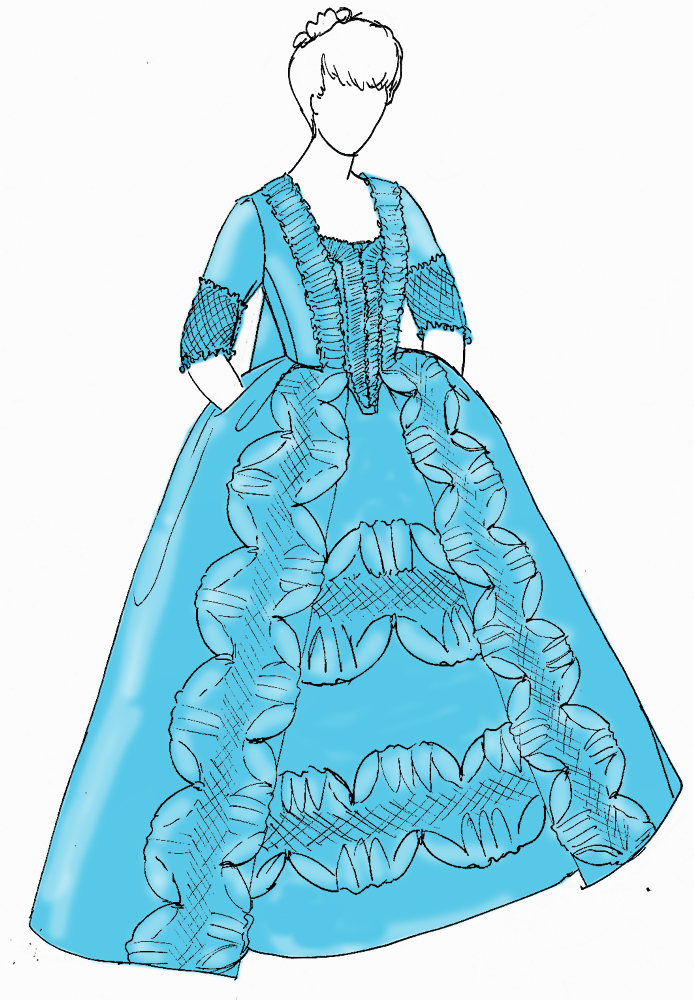
I have started my new cape so I thought  I’d quickly set out the measurements of dye needed.


For a 2.5m long cape:


Do this in two batches, do not be tempted to do it all in one go unless you have an industrial sized pot and oven!


5m of 150cm tulle/net


1 dye pack of iDye poly blue


2x Color enhancer (unless you have access to the colour enhancer sold separately (I wish I did!)


Stovetop


Stock pot


tongs


whisk


measuring jar (and two smaller identical containers)


bucket (2x if you want to save the dye)


Latex gloves


Additional: horsehair braid for hem will also tint to match.


Pre-wash the net to remove any shop dust or sizing that may be on the fabric. I often use a liquid dish soap for this. It creates a lot of foam but it really strips any oils off. Dry fabric.


Divide the length of fabric into two 2.5m lengths.


Dissolve the dye in a glass measuring jug use about 2 cups. Whisk the dye through to totally dissolve the now gummy pack.


Heat water in a very large stock pot. I am not sure what mine is but I fill it to 2/3 then top with boiling water to a level the dry tulle comfortably fits in. When wet it will collapse and so be able to stir evenly.


Once the water is simmering add half the dye. I had no markings on my jug so I first divided it equally between two glasses that had obvious markings to use as a guide.


Then tear the colour enhancer pack perfectly across and use every last drop.


Let water come to near boil.


Quickly use the tongs to transfer the tulle to the pot, short lengths at a time, push the newer fabric so that the earlier fabric moves along and creates a circular spin in the water, continue to add the fabric until all is in the pot. Using the fabric dry will not cool down the water and so will actually help get a very vibrant colour.


Boil and stir for 5m.


Transfer to bucket and take the fabric out of the bucket on a lawn. This saves the dye and also cools the fabric and dye down to stop the dyeing process.


If you do not have an out door area, then put a plug in to a stainless steel tub and rince dyed tulle under cold water. This too will stop the dyeing process.


Repeat for the other side.


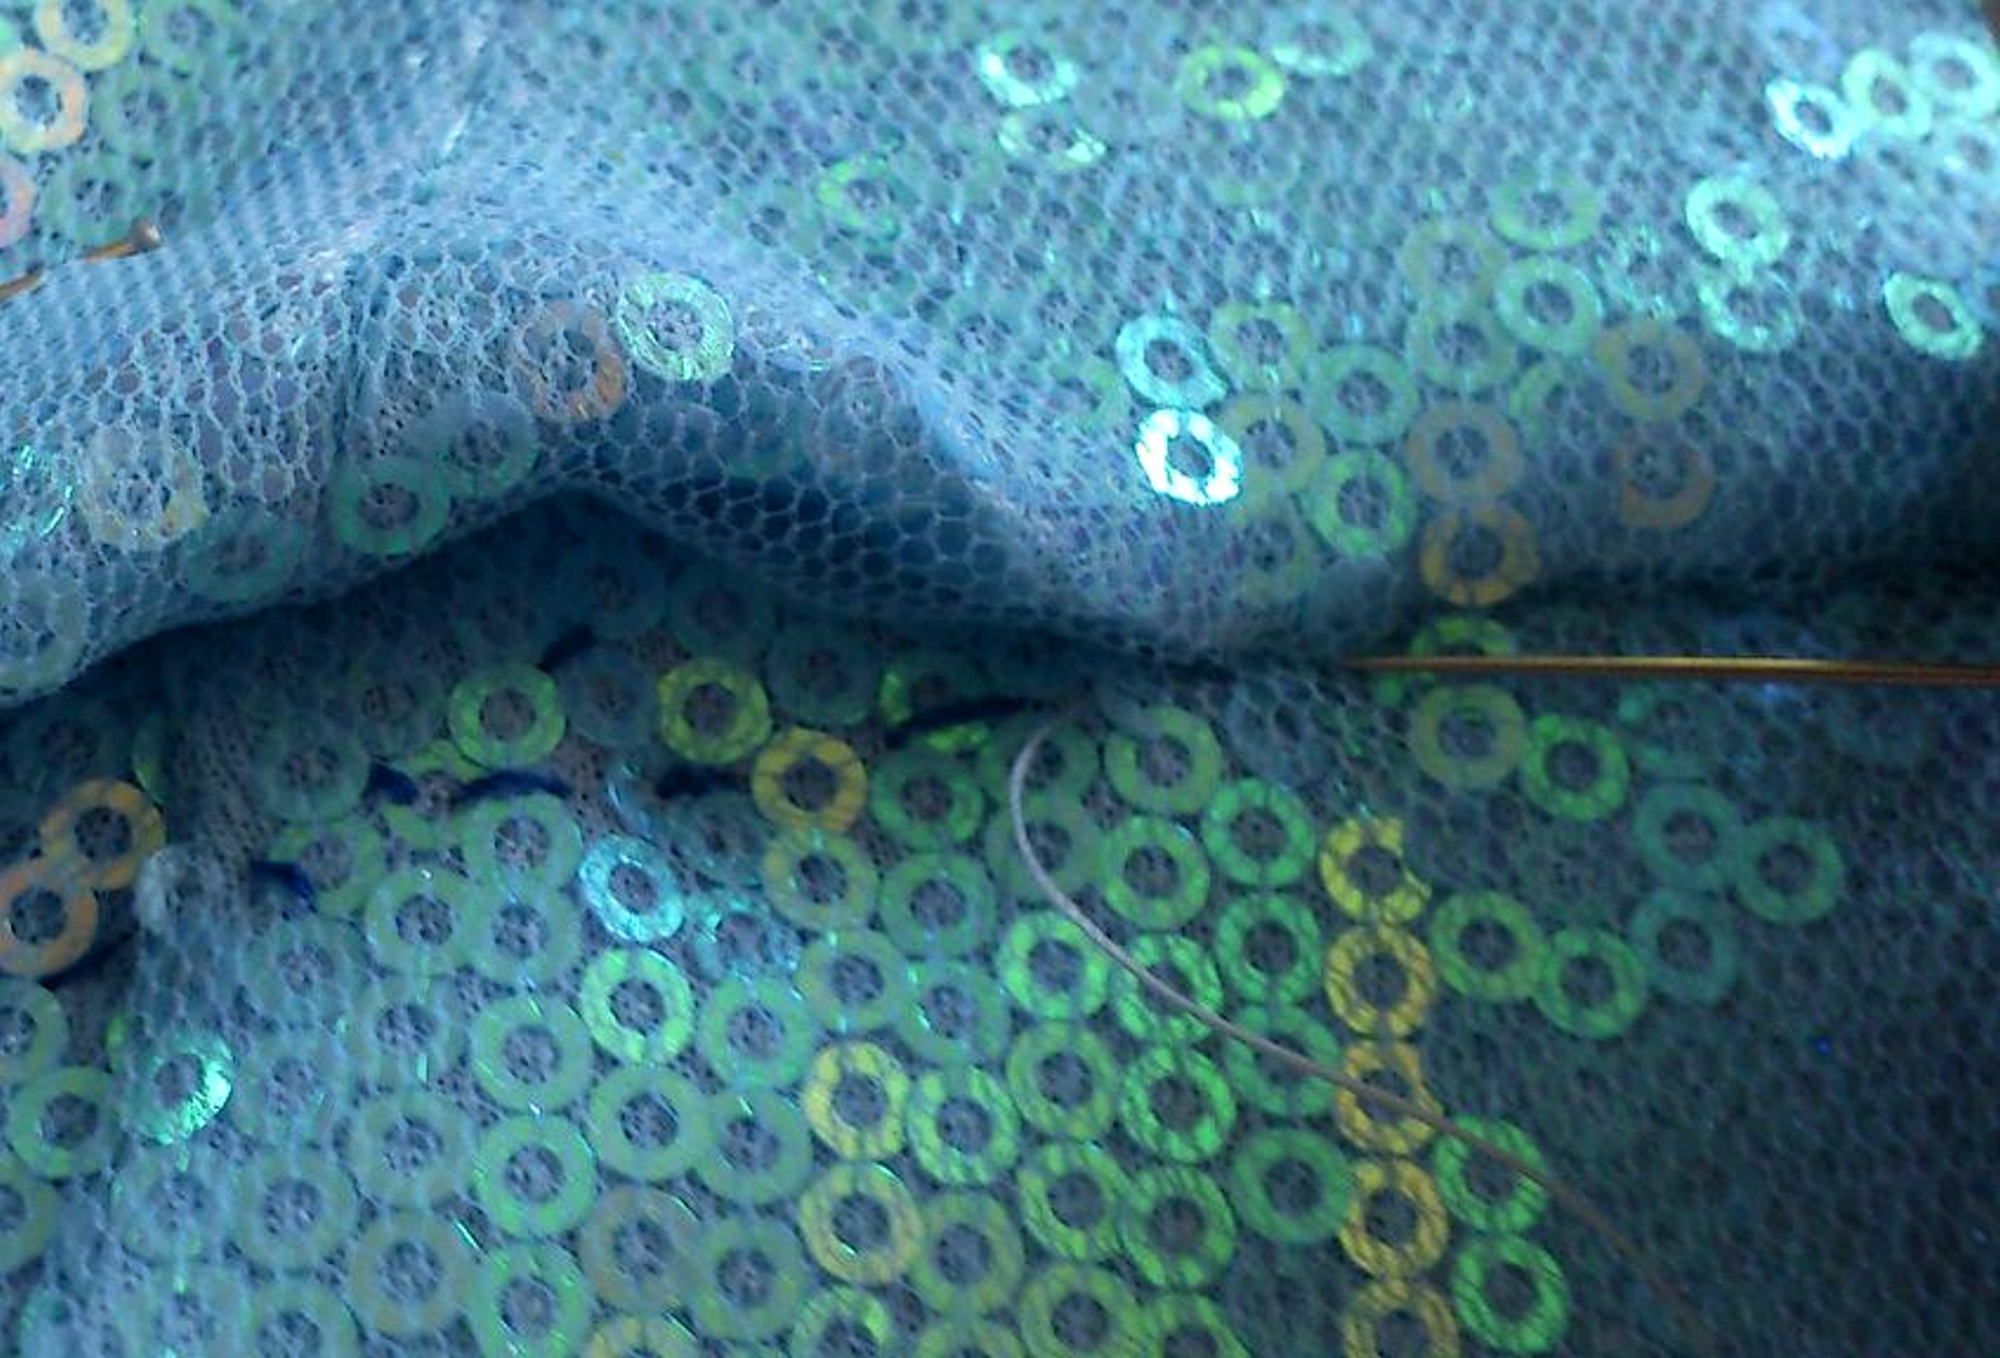
The fabric will be very dark. It will seem to dark. But tulle and some nets are made from totally clear monofilament. What this means that as it dries it will allow light through but also bounce white light back from the glossy surface. This will eventually turn the net royal blue.


This dark  tone in turn also makes the net even more translucent against your dress and the floor. It will then create very distinct lines of colour when pleated into crisp angles.


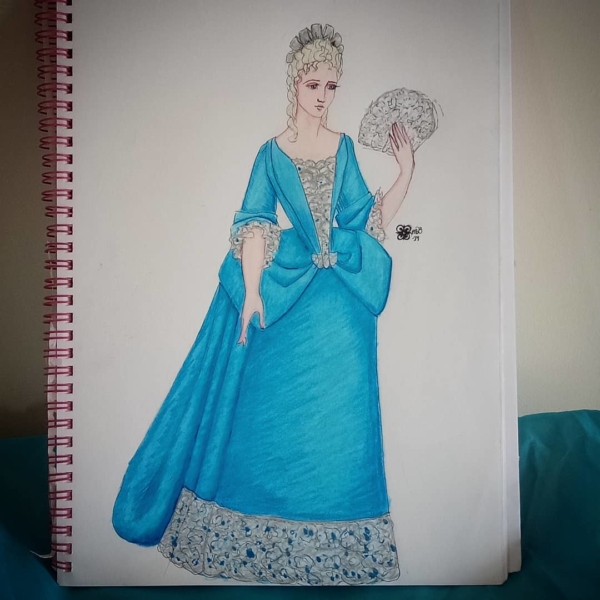
Note how the cape is quite dark while the snowflake designs are paler and very light reflective.


If you are nervous then it is possible to use half the dye pack for both lengths but still 2x colour enhancers. It will create a blue that is more what people expect her cape to be. In very close up details the cape fabric is indeed quite dark. The aforementioned physical properties of clear monofilament

glittersweet: (Default)

ELSA BLOGGING, LAST POST OF THE DAY


by admin, December 22, 2014


The book is Elements of Modern Dressmaking. It’s on Gutenburg and I am pretty sure I posted the huge section on bodice linings on my blog (search for sateen 🙂 )


Mina and the beaded chiffon make an appearance. Best viewed in 720 or 1080 resolution to actually see anything I’m rabbiting on about.


If you spot the fluffy balls of yarn and guessed Pink Diamonds was on the re-do list you’d be right 🙂 I need to treat the yarn in a way to make it a bit more able to stand out than it is currently, I got to see how heavy the original is. No way I’m sewing anything as heavy if not heavier!


glittersweet: (Default)

ELSA LENSES WIG LIPGLOSS!


by admin, December 4, 2014


2 COMMENTS


    • KRISTEN

      REPLY


    • December 5, 2014


    that is a great wig!


    • MEILIN

      REPLY


    • December 5, 2014


    Looks great! 🙂


glittersweet: (Default)

ELSA LIVEBLOGGING 2


by admin, December 22, 2014


Whoops ahead of myself, first pic was finding where I left off 🙂

Now thread emerges out of skirt layer one sequin width to the left, pick up bodice fabric one sequin to the right. The natural twist and resistance of the thread means this is not a messy as it sounds.

Gutermann quilting cotton colour 6217.


glittersweet: (Default)

ELSA LIVEBLOGGING 1


by admin, December 22, 2014


Seam guide in dark blue sewing from the top with a locking stitch to pull and lay the two layers together.


glittersweet: (Default)

ELSA LIVEBLOGGING 5ISH


by admin, December 22, 2014


Unpicking the fabric guides. Dark blue stitching line, pale blue to hold the skirt shell to the edge of the bodice lining.

Pins have to old everything! So I’ll do this section by section.


glittersweet: (Default)

Elsa liveblogging 7 I think


Seems to work for tumblr otherwise sorry, I’ll edit the code later. Going a bit dizzy with the sparkle.

glittersweet: (Default)

ELSA OMBRE DYED!


by admin, December 26, 2014


Obnoxious Bart Mode enabled. I need a pan for a hat and one for a drum to shout “I am the greatest, everybody loves me, I am the greatest” because I freaking ombre dyed fully sequinned fabric and I so deserve it!

Recipe is equal parts Kelley Green and Turquoise but in a very dilute bath and a bare skant amount of colour enhancer.

But baby that is ombre dyed and while the hem and bodice are very different, it’s very hard to find where they merge.


Booyah!


glittersweet: (Default)

ELSA TESTING, BODICE POINT


by admin, December 11, 2014


Yep, have to hike it up a little each hip. The skirt position is good i just need to baste the waistline higher- you may be able to see the dark stitch line.


2 COMMENTS


    • MUTIVE

      REPLY


    • December 12, 2014


    Oh, wow. That is looking phenomenal. (And I love all the glitter.)


      • ADMIN

        REPLY


      • December 22, 2014


      Thank you 🙂 it has just a nice amount of shine with the tulle 🙂 Very Galinda=ish 🙂 Now that i s a costume I wish I was able to hand bead. I started but had to give up. The first scatter of sequins on the smalest petal seized up my wrist. And it’s the kid of seizing that is double bad in RA.


glittersweet: (Default)

ELSA LIVEBLOGGING FOR THE NEW YEAR!


by admin, December 31, 2014


I managed to start working with latex again for others but I’ve had a Bellini so now it’s my own work 🙂

Starting with…. Bodysuit snaps!


This will be interesting….


glittersweet: (Default)

ELSA LIVEBLOGGING WHATEVER


by admin, December 22, 2014


My posts are a bit backlogged due to file size- updated WordPress and that setting seemed to change.

Anyway. Back to original plan. Pinning the shell layers and removing the stitching guide.

The shell layers are stretchier than the lining which is why I wanted to use it to hold the layers in place, but three or four layers of sequins is too much bulk at the waist seam.


ELSA REDO

Mar. 16th, 2017 07:09 am
glittersweet: (Default)

ELSA REDO


by admin, December 7, 2014


Not totally! But with the repeated delay in being able to handle wearing a costume I have undone some of the work I already did. Now I can implement my plans for the bodice and sleeves and all the rest 🙂 So I’ll be taking the shell bodice off and getting photos of the very well supported inner piece (with bust enhancers and every thing).


Right now though it feels like a norovirus mixed with flu, so totally not feeling any desire to get dressed in anything other than singlet and yoga pants right now! Probably won’t until well in to the new year unfortunately. It does mean the antibodies are working- they knock out a specific set of B cells so not only is there a reduction of protection against certain bugs but also that current attack is leading to massive cell death which means lots of nasty waste making me feel sick without being sick.. or maybe.. anyway.


Time for some paracetamol, metamide, and an ice pack for my head.


Profile

glittersweet: (Default)
pinkdiamond

June 2024

S M T W T F S
      1
2345678
9101112131415
16171819202122
23242526272829
30      

Syndicate

RSS Atom

Most Popular Tags

Style Credit

Expand Cut Tags

No cut tags
Powered by Dreamwidth Studios